|
|
Splinted Arms
by Dwarlock
a.k.a. Johan Roraback
This is a fairly simple pattern for a full arm made of leather reinforced
with steel splints. What you need:
- Steel 18-16 gauge (I used 16 gauge stainless)
- Leather 3-8 ounce (It does not have to be heavy leather at
all; the steel is the armour. All the leather is is backing)
- Rivets 1/8 inch wide (you can cheat with roofing nails, but rivets are better)
- Burs/washers (as many of these as you have rivets, and
you want their inner diameter to match the outer diameter of the rivets)
This arm is made in 3 pieces, the rembrace (upper arm) the vambrace (forearm)
and the elbow cop. I will instruct you in the making of the rembrace
and the vambrace but not the elbow cop. (There are several articles
on construction an elbow cop already -- no need to make this one another)
(BTW, the elbow cops in the pictures I used were made by Gundobad, of
Wise Ogre Armoury, thanks again Gundo), and Ron Simmons.
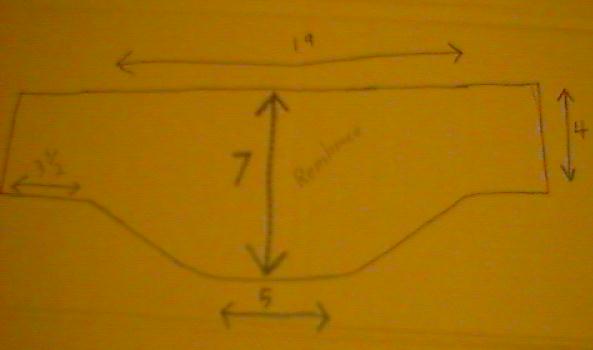
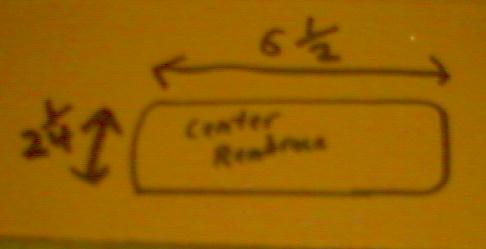
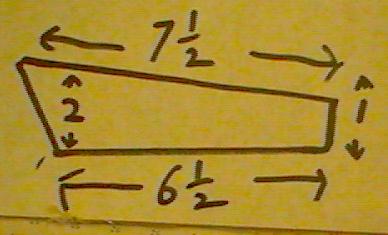
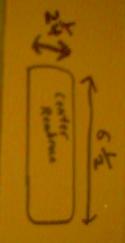
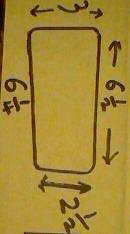
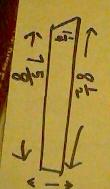
The Rembrace
Patterns (Click on thumbnail for full-size image)
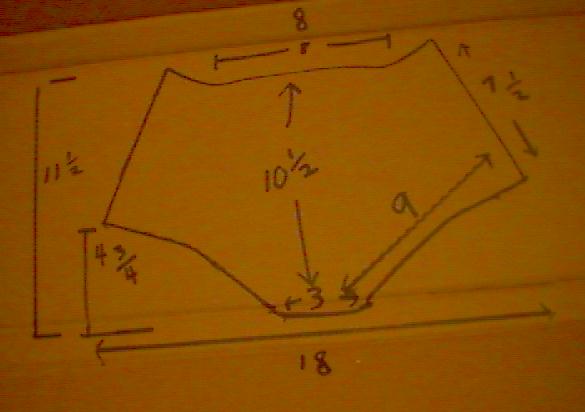
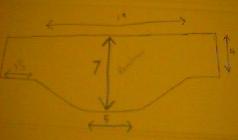
- Leather Backing
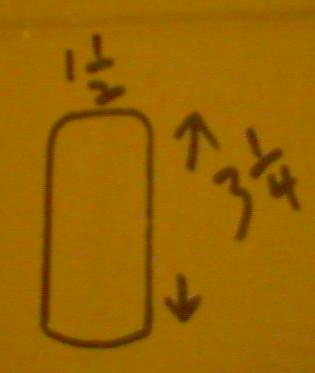
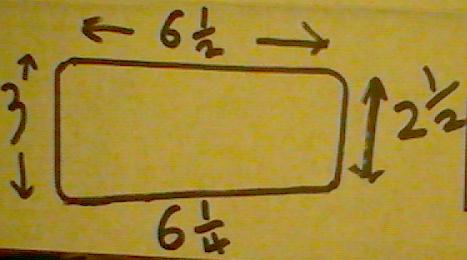
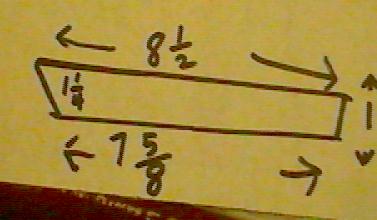
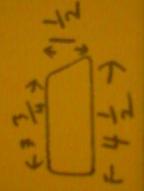
- Plates (need two of all plates but the first and last)

Instructions
- Cut out the leather (most likely scissors will work well for cutting this).
- Cut out the plates. Remember that you need two of each plate exceptDrill or punch rivet holes in the plates, either using your rivet pattern
or the one I used.
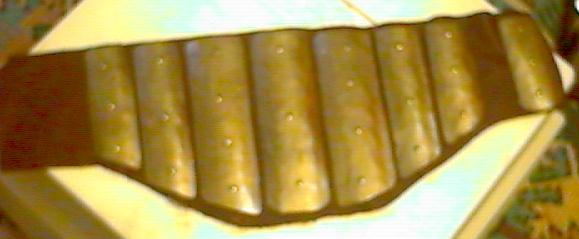
- Place the plates on the leather as shown in the first image above.
- Mark the leather through the holes in the plates, and then take the
plates off the leather and punch holes where the markings are.
- Give all the plates a bit of a shallow roll. This can either be done by
placing the plate on a depression and whacking it with a hammer, or
you can place it on something round like a pipe and whack it
with a hammer. or you can get lazy and improvise some sort of press.
(For best results, or if your gona make a lot of these, use a press.)
- Place the plates back onto the leather, put the rivets through the holes,
place the burs/washers on the ends of the rivets and peen them down.
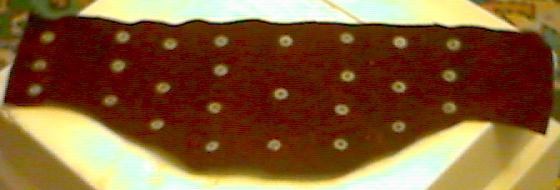
- Now, the piece is mostly complete. All that remains is to overlap the
ends by a hair more than the width of the center plate and sew/rivet
the piece closed (see last image above).
You have now completed the first piece of this arm armour.
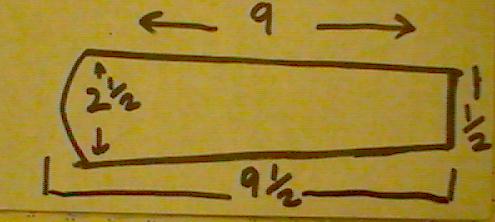
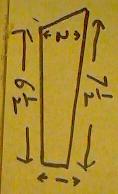
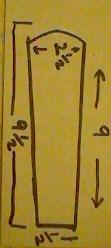
The Vambrace

Patterns (Click on thumbnail for full-size image)
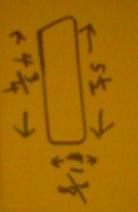
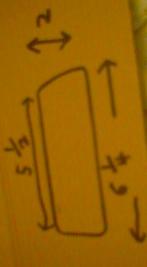
- Leather Backing
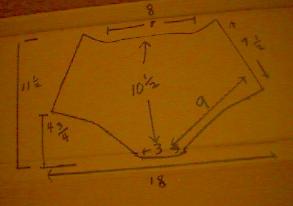
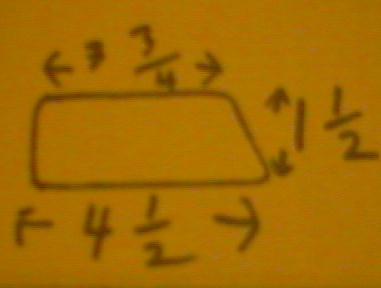
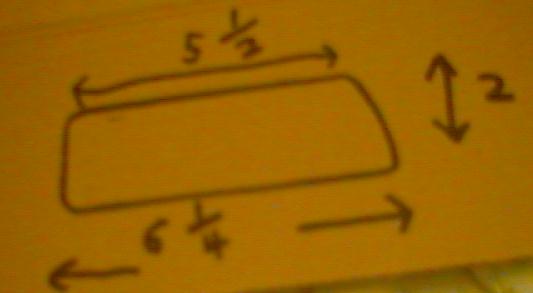
- Plates (need two of all plates but the first and last)
Instructions
- Cut out the leather.
- Cut out the plates. Remember that you need two of each plate exceptAs with the rembrace, drill/punch rivet holes in the plates
- mark the leather, punch holes, roll the plates, and rivet on.
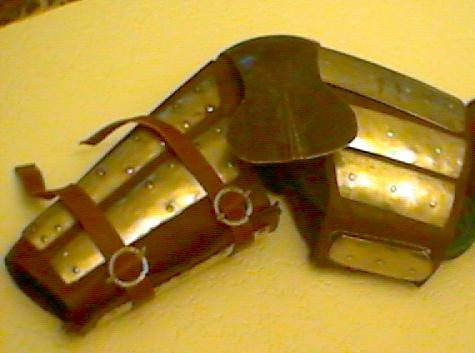
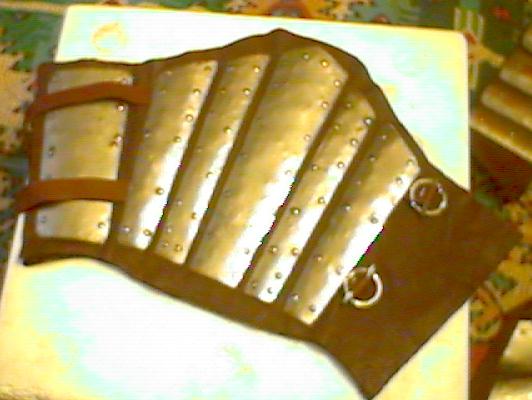
- Before finishing place straps between the leather and the plates as shown above
- Either put buckles on the straps, or make your own buckles.
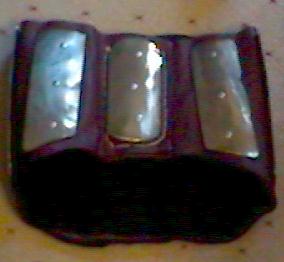
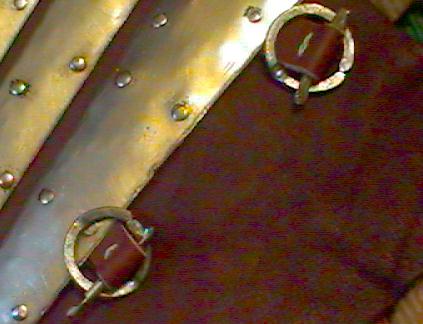
Buckles
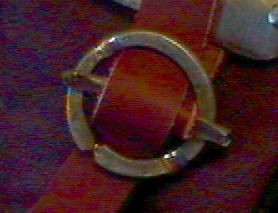
Here are 2 pics of the buckle I use. they should be sufficient for you to make your own.
I used 9 gauge stainless steel wire. the circular part of the buckle is an inch across.
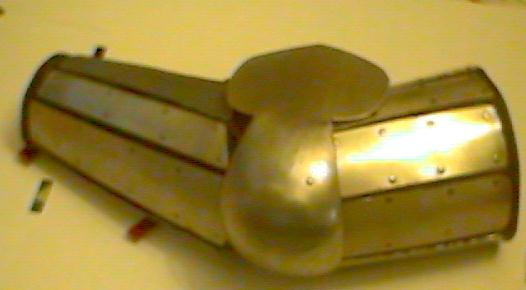
Final Assembly
Assuming you have all the pieces done -- Vambrace, Rembrace, Elbow cop --
there are several ways of finishing the piece.
- You could wear all 3 pieces separately
(works but bad idea, However the vambrace is cool by itself)
- You could attach the rembrace and vambrace to a 3-5 piece articulated
elbow (easy to do but if your going for articulated steel you might
as well wear full steel arms)
- You can attach the leather edge of the rembrace and vambrace
directly to the elbow cop. (This is what I did in the pic,
It works but is better if you leave a little extral leather on the
ends that need to be connected)
- Or last, and perhaps best, you can attach leather straps to both the rembrace,
and the vambrace, and then rivet the straps to the elbow cop. (this works really well,
and allows a lot of customization for size)
Additionally, you can add straps or points to connect these arms either to
your spaulders, or to your gambeson.
|