These Patterns are free to all with the understanding that credit should be given to the owners.
|
These Patterns are free to all with the understanding that credit should be given to the owners. |
|
Arming Cap
This essay is for someone with minimal sewing skills. If you’re not too good at sewing, find someone who is and ask him or her all those basic sewing questions. Materials
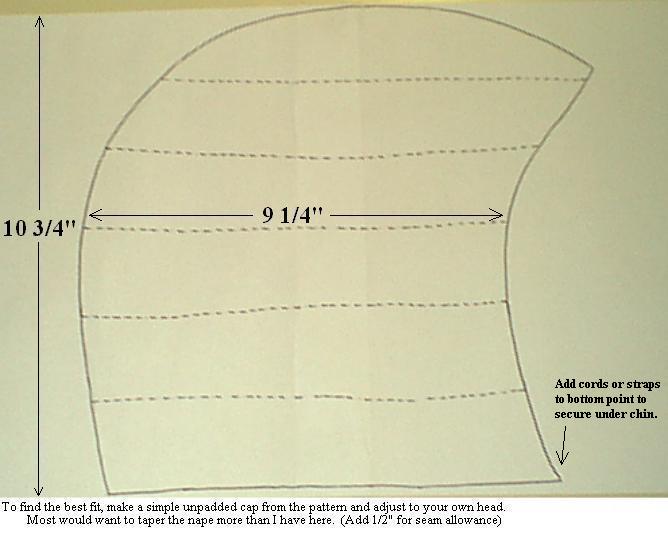
Pattern
Adjusting the pattern
Construction
You now have two pillow-like pads that need quilting to keep the stuffing in place. This is the part that I’m glad I did on a sewing machine. Decide how far apart you want the stitches and mark them with chalk or something else that will come out. The closer they are the more shrinkage you will get. After they are both padded and quilted you can put them together. Attach them along your half-inch of extra fabric along the curve, while leaving the front and bottom open (I hope everyone already knew that.) Now if you turn it inside out you will have a nice arming cap with unfinished edges along the face opening and bottom edge. This can be remedied by folding them in and stitching to keep it there. Your cap is only missing some way of securing it underneath your chin. If you are good with leather you can put a little strap and buckle from one point to the other, or if you are like me (lazy), you can attach two cords from the points. You now have a nice piece of padded armour. Go make your friends jealous and show it off. Just remember it makes hearing things a bit harder. 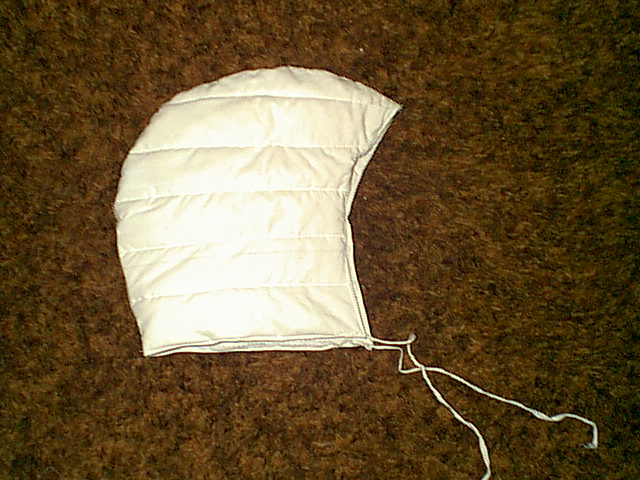
|