Riveted Maille,
A practical approach.
by Rev. George
Riveted maille has long been an elusive
art, oft spoken of with much more difficult that it really is. In this
essay, It is my intention to shed some light on a simple, effective method
of producing riveted maille. Before I go any further, I would like to thank
the following people: Stephen of Forth Castle, his study into techniques,
as well as oft questions define the impetus for my interest; Eric Schmidt,
he also shed some light ; both of these gentlemen frequent the Armour
Archive Sara Trice, also a good source for information,
as her Sara's chain mail connection is a temple of maille.
To make riveted maille via this method,
you first need rings. Common wisdom says that one should use small (and
therefore of high gauge number) wire, as the riveting process imparts quite
a deal of strength. In the future this will occur. For this essay, i used
what i had on hand, 1/2" inner diameter rings made of 11.5 GA galvanized
hi-tension wire. This is about the worst material I could have chosen.
First, the wire is wicked tough, second, it is heavy, and third, it is
galvanized.
DO NOT USE GALVANIZED
WIRE Galvanized wire
is made by the application of zinc. When this zinc is heated (more on that
later) toxic fumes are produced. These fumes will KILL, so don't risk it.
To make the rings, you need to coil the wire around a Mandrel (a round
dowel, etc.) , then clip the coil with cutters. For smaller wire, I use
a pair of highly modified needle nose pliers, I cut the noses off, and
ground one side thinner, to fit inside a small (3/8") coil.
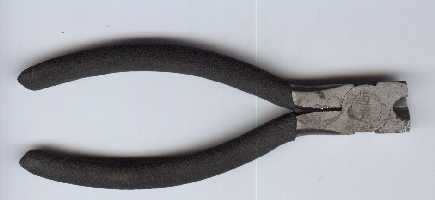 here
is a picture (linked to a larger pic) of said snippers. For larger coils,
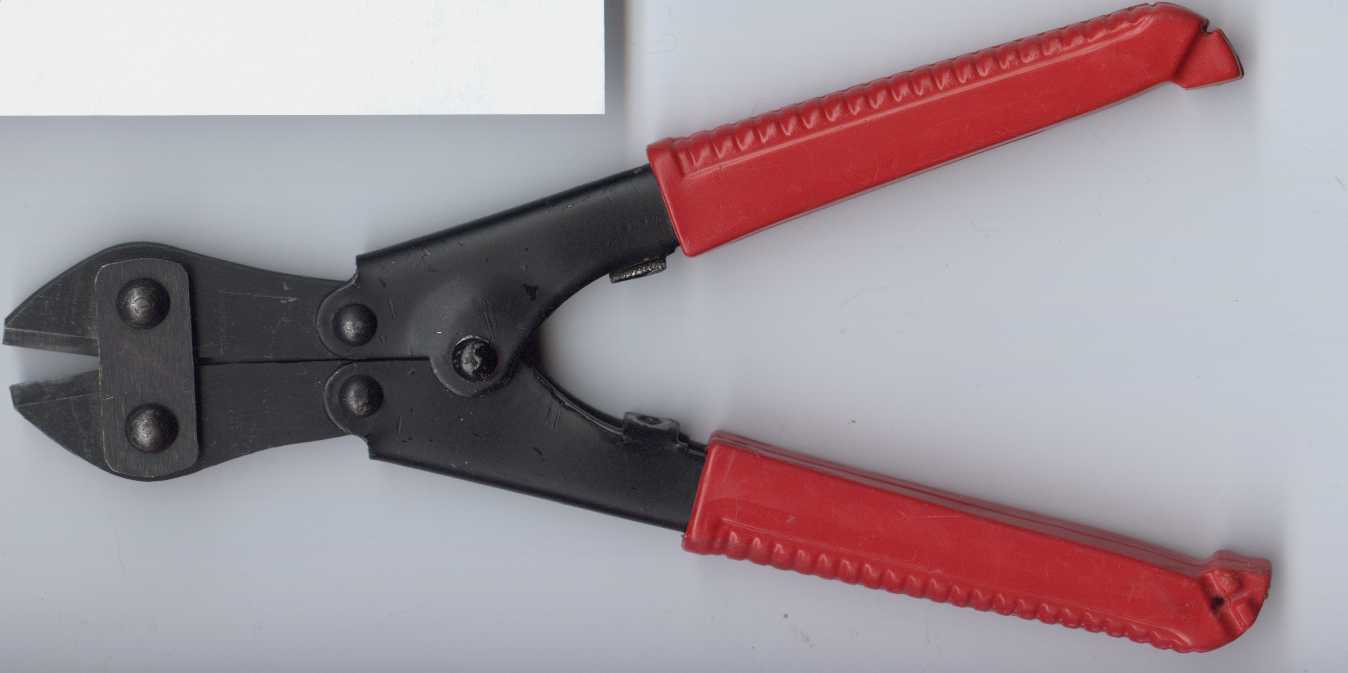
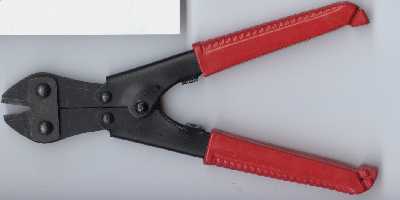
i use 9 inch bolt cutters from the Great Neck Tool Company. here
is a picture (linked to a larger pic) of said snippers. For larger coils,
i use 9 inch bolt cutters from the Great Neck Tool Company.
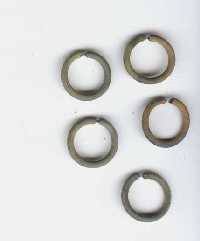
 By
twisting the cutters clockwise, causing the bottom jaw to press against
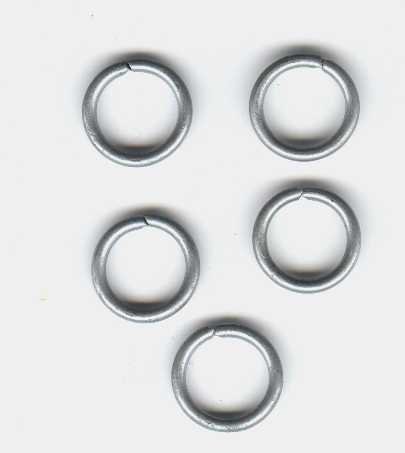
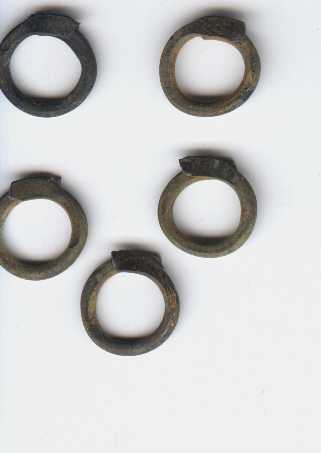
the inside wall of the coil, i get a very clean cut. Here is what the rings
look like: (linked to a larger image) By
twisting the cutters clockwise, causing the bottom jaw to press against
the inside wall of the coil, i get a very clean cut. Here is what the rings
look like: (linked to a larger image)
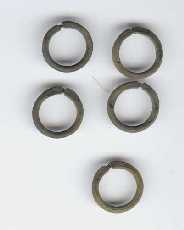
  these
are the rings I use for most of maille, my hauberk, coif, etc., It is a
compromise in cost, toughness, and speed of assembly. The steel is, however,
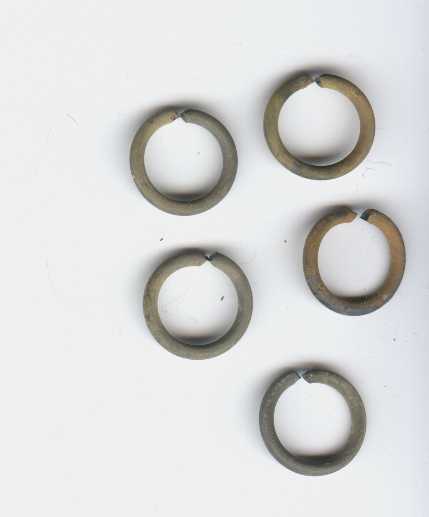
pretty hard, and requires annealing. This is accomplished (for ferrous
metals) by heating to a glowing red, then allowing to slowly cool. I did
this by stringing the rings on a piece of wire, and placing in a fire of
charcoal (notably, my grill, after a weenie roast) I came back later (the
next day), and retrieved them . They looked like this: these
are the rings I use for most of maille, my hauberk, coif, etc., It is a
compromise in cost, toughness, and speed of assembly. The steel is, however,
pretty hard, and requires annealing. This is accomplished (for ferrous
metals) by heating to a glowing red, then allowing to slowly cool. I did
this by stringing the rings on a piece of wire, and placing in a fire of
charcoal (notably, my grill, after a weenie roast) I came back later (the
next day), and retrieved them . They looked like this:
After this, the metal is much more soft, and can be easily
hammered, bent, etc. Eventually the rings will need to be overlapped, and
flattened, but i find it easier to do a "pre flatten", a step which some
people consider unneeded. I personally feel it adds a small step, but makes
a second step easier. To pre flatten, merely place on a flat, heavy metal
surface (anvil, metal weight, railroad track, etc.) and strike the ends
with a hammer until slightly flattened, thusly:
  The
next step is to overlap the rings. This can be done in a variety of ways,
i personally use linesman's pliers. they have a circular hole in the backside
of them that works well at keeping the edges round. After overlapping,
the rings should look thusly: The
next step is to overlap the rings. This can be done in a variety of ways,
i personally use linesman's pliers. they have a circular hole in the backside
of them that works well at keeping the edges round. After overlapping,
the rings should look thusly:
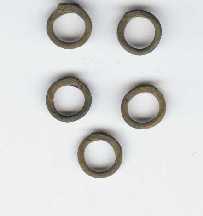
At this point, depending on the wire type you used, It
may be necessary to anneal again. I personally had to, but if you choose
a naturally soft wire, you might not need to. After annealing (or next,
if you choose not to) you will need to flatten the overlapped area. Some
people so not do this, but for the maille to look authentic, the 2 overlapped
parts must fit into each other perfectly, a feat only accomplished
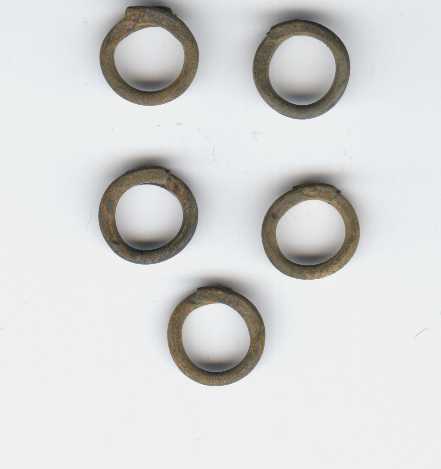
by a post overlap flattening. If all is done well, and you did the pre
flatten, a few hardy hammer strikes is all that is needed to produce rings
similar to these:
 The
next step is to put the rivet holes in the flattened area. The choice of
the tools depends on the type of rivet you plan on using. Two types predominate
the historical examples, round, and wedge. I personally use round, if for
no other reason that I own a drill, and could not afford the materials
to make a wedge punch. According to Stephen of Forth Castle, a good punch
(or more appropriately, a pierce(?) ) can be made with a few small modifications
to a glass and tile drill bit (the smallest in a set commonly available
at walmart) with a diamond cutting wheel attachment for a dremel tool.
If you choose to do this, refer to his essay, which I am sure is coming
soon. If you choose to make round holes, you have several options. A drill
will suffice, though it can be slow and prone to wander, various punches
can be had, including the whitney style, though I have never done this.
Once the holes are made, whatever the method, you will need rivets. The
wedge style is made by nipping small pieces of flat metal into little triangles.
Again I refer you to Steven of Forth Castle. For the round rivets, some
people use sewing pins, I personally use these: The
next step is to put the rivet holes in the flattened area. The choice of
the tools depends on the type of rivet you plan on using. Two types predominate
the historical examples, round, and wedge. I personally use round, if for
no other reason that I own a drill, and could not afford the materials
to make a wedge punch. According to Stephen of Forth Castle, a good punch
(or more appropriately, a pierce(?) ) can be made with a few small modifications
to a glass and tile drill bit (the smallest in a set commonly available
at walmart) with a diamond cutting wheel attachment for a dremel tool.
If you choose to do this, refer to his essay, which I am sure is coming
soon. If you choose to make round holes, you have several options. A drill
will suffice, though it can be slow and prone to wander, various punches
can be had, including the whitney style, though I have never done this.
Once the holes are made, whatever the method, you will need rivets. The
wedge style is made by nipping small pieces of flat metal into little triangles.
Again I refer you to Steven of Forth Castle. For the round rivets, some
people use sewing pins, I personally use these:
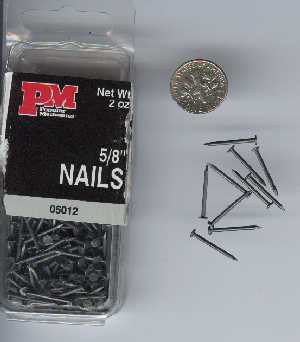 You
can pick them up at Wal-Mart, for around 2 bucks. Anneal them, I do this
by pouring them into a metal ladle, and heating them with a torch, then
allowing to slowly cool. Put them through the hole you made, trim
the length, and squeeze them between pliers. This will set your rivet.
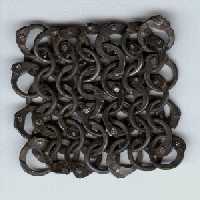
Assemble in the usual way. If you have never made Maille before, I shall
refer you to the "Strangeblades
and More" Animated Guide to Making Chainmail **her site shows you how
in the simplest terms i have seen thus far. And, if all is done right,
your effort should look like this:: You
can pick them up at Wal-Mart, for around 2 bucks. Anneal them, I do this
by pouring them into a metal ladle, and heating them with a torch, then
allowing to slowly cool. Put them through the hole you made, trim
the length, and squeeze them between pliers. This will set your rivet.
Assemble in the usual way. If you have never made Maille before, I shall
refer you to the "Strangeblades
and More" Animated Guide to Making Chainmail **her site shows you how
in the simplest terms i have seen thus far. And, if all is done right,
your effort should look like this::
 That's
it. It is my intention that this show you exactly how easy the process
is, and will, hopefully, lead you to attempt it yourself. I can usually
answer most questions via e-mail, but it would be my hope that this essay
answers all of your questions. That's
it. It is my intention that this show you exactly how easy the process
is, and will, hopefully, lead you to attempt it yourself. I can usually
answer most questions via e-mail, but it would be my hope that this essay
answers all of your questions.
**It has come to my attention that the proprietor of Strangeblades has
removed said helpful and informative essay. it seems that she had several
complaints ranging from the legitimate ("you've stolen my images", or "You've
plagiarized my jewelry designs") to the absurd ("how dare you link my page!").
Sigh. Its a shame that its gone, but I shall leave the link up, so that
you can read her side of the story.
|