"Crusader Knees"
Well, these elbows and knees go by several names. I guess it all
depends on what you wear them with. Most historical examples are not dished as
deep as these, nor do they protect the sides of the rear portion of the knee joint.
Due to SCA requirements, these are both deeper and wider than their historical
counterpart. These are and excellent piece to learn several armouring techniques.
Dishing, fluting, flaring...etc, it's all here. Now, onto the methods:.
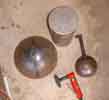
1.) Something to cut metal ( I use B1 shears).
2.) Something to flare metal over (flat surfaced with fairly sharp even edge)
3.) Some way to dish metal
4.) large diameter ball peen, medium flat faced hammer
5.) chisel or other item for fluting/creasing.
These pics are what I use.
|
|
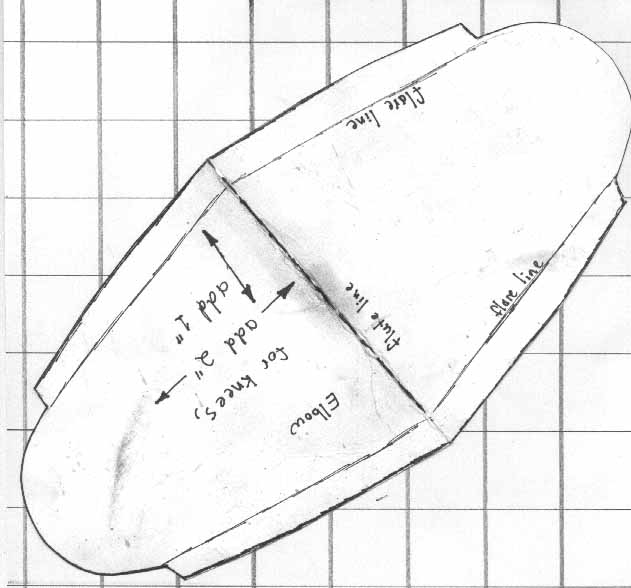
Start with the patterns. These fit me great. Since there are no articulating lames and such,
this pattern will fit most "average sized" people. If you are very skinny, or very wide,
you'll have to adjust the pattern pieces. Cut these out of posterboard and wrap around your
knee/elbow. They should come level with the back of the elbow/knee while wearing padding.
The dotted lines are where you should mark the metal for reference points to flare and flute.
|
Elbow
|
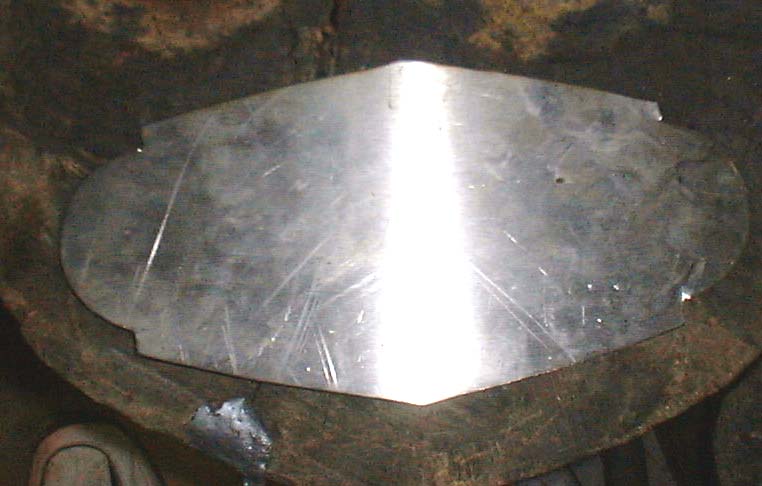
Lay out your patterns on metal and mark everything. Before you cut everything out, use a
1/4" drill bit and drill a hole at the end (outside edge) of each of the flares. This
prevents you from cutting into the "good" portion of ther piece when cutting it out.
Cut the pieces out of metal. Mark all the reference line by scratching them in on one side.
|
|
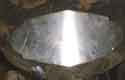
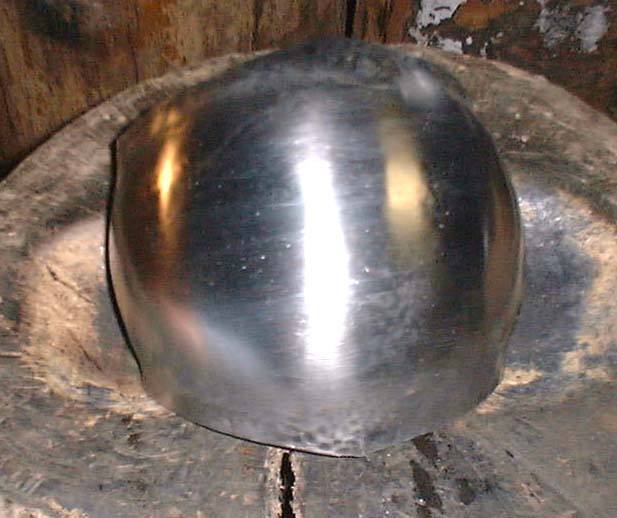
Now dish the pieces. Dish them as deep or shallow as you want. I use about a 8" diameter
for knees and 6" for elbows. remember, when you go back and put a center flute in, your
dishing will shallow out a bit. I dish the whole piece, and then go back and flatten the
side portions slightly. It's ok if the edges aren't dished totally since you'll be bending
them backwards anyway.
|

|
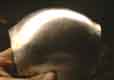
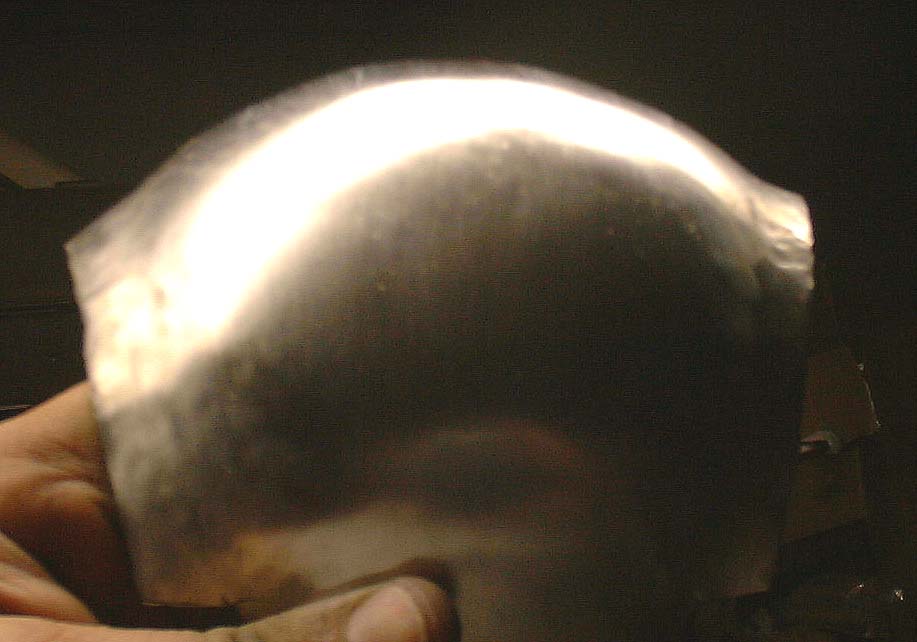
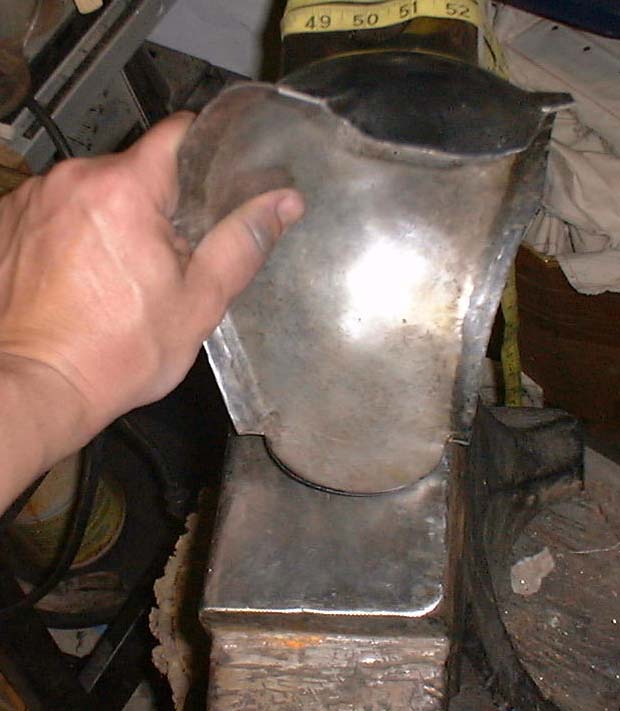
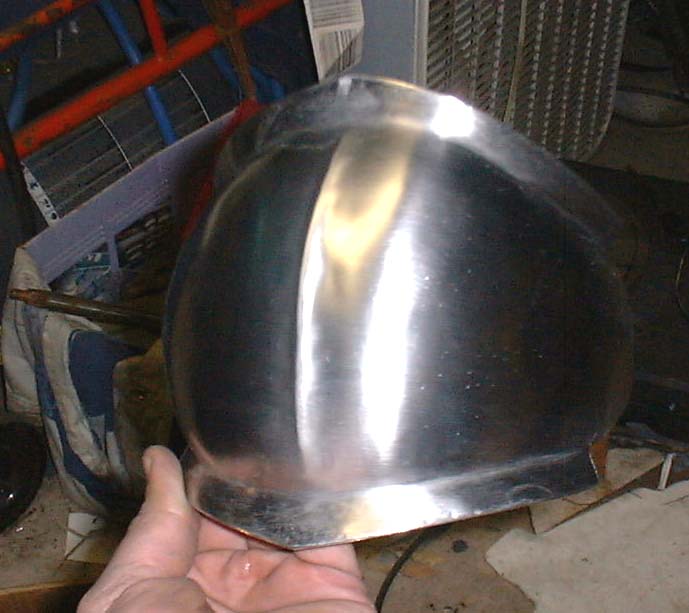
Once they're dished to what you want, you'll start the flaring process. I hammer the
edges down over the edge of the stump. All you want to do is beging to stretch the metal.
I use the large rounding hammer for this (4 lb). Take a little at a time to start and do
it in passes. It will start looking like the pictures.
|

|
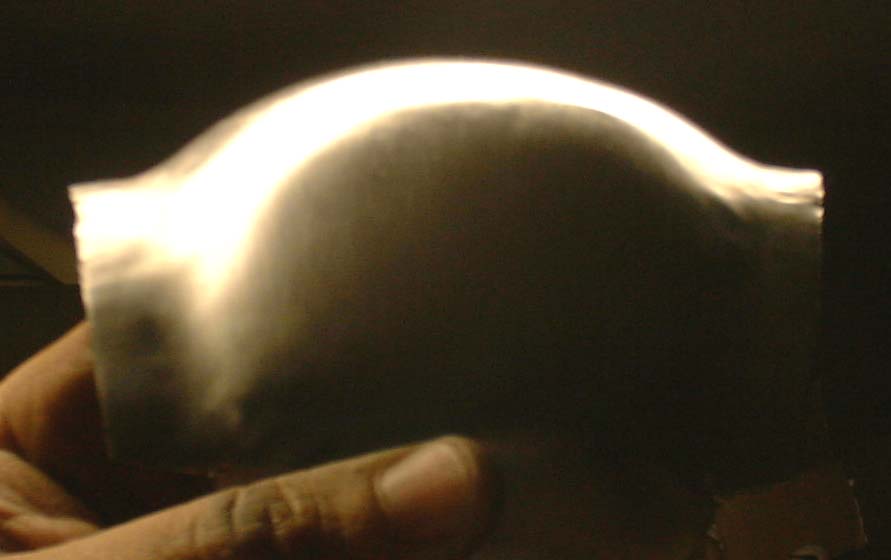
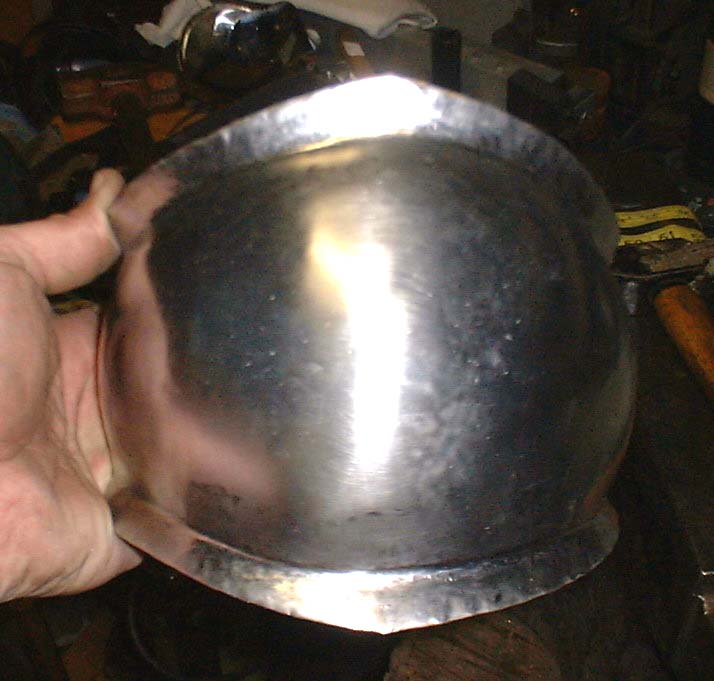
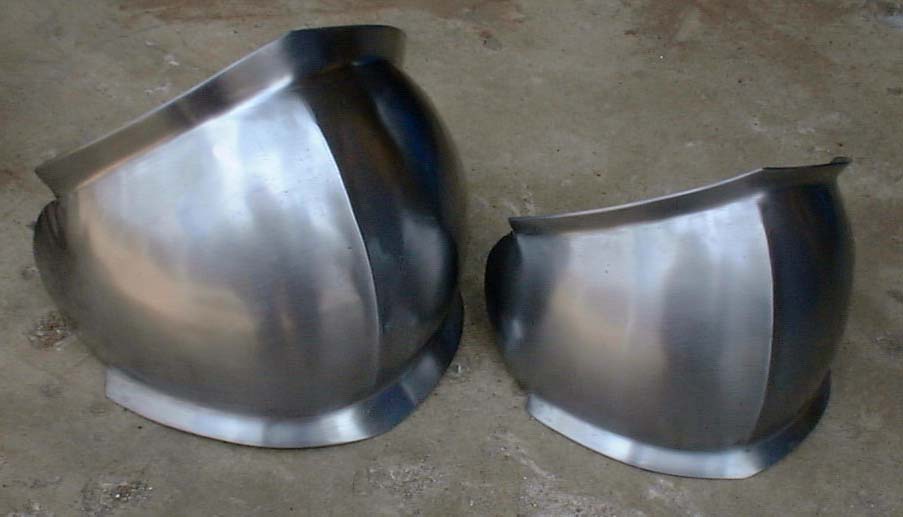
Now you'll start to define the flare better. This is what makes these stand out.
I've seen many that leave a undefined flare and they look crappy. It's also a spot
where you'll screw up the most. I use an edge of my anvil for this. You should see
the line you scribed earlier on the inside of the cop. You want this line to be
directly over the edge of the anvil (or whatever you're using). LIGHTLY tap the
cop along this line. Hit it hard enough to slightly leave hammer marks. Once again,
I use the large rounding hammer. After the first pass, look at the other side. if
your line is pretty straight, start doing several more passes with heavier blows.
You should begin to get a nice crisp flared edge now. The first pic shows the
placement on the anvil. The second shows the beginnings of the line forming.
|

|
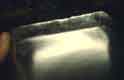
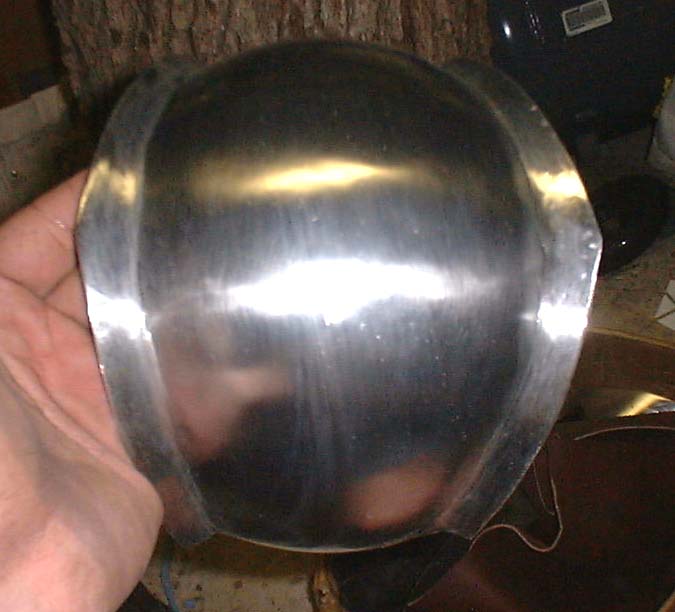
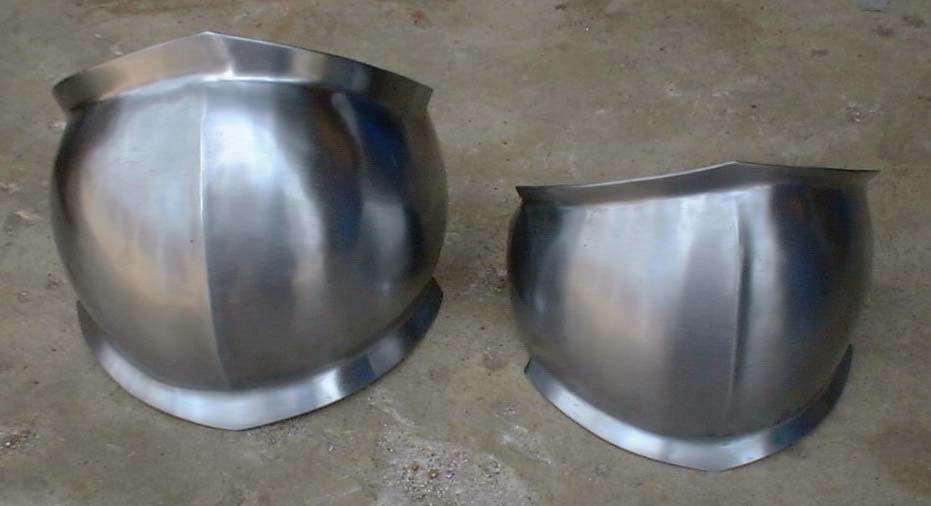
Now, go back and hang the flared edge off the edge of the anvil. LIGHTLY tap
along the lower edge of the flare line. This takes out any irregular lumps and
straightens the line. If everything still looks good, set it again so the flared
edge is on the anvil and use a fairly flat hammer. Now, beat it until smooth.
Take your time and don't try and do it all in one pass. Here's the second placement
on anvil and the piece after flattening and smoothing.
|


|
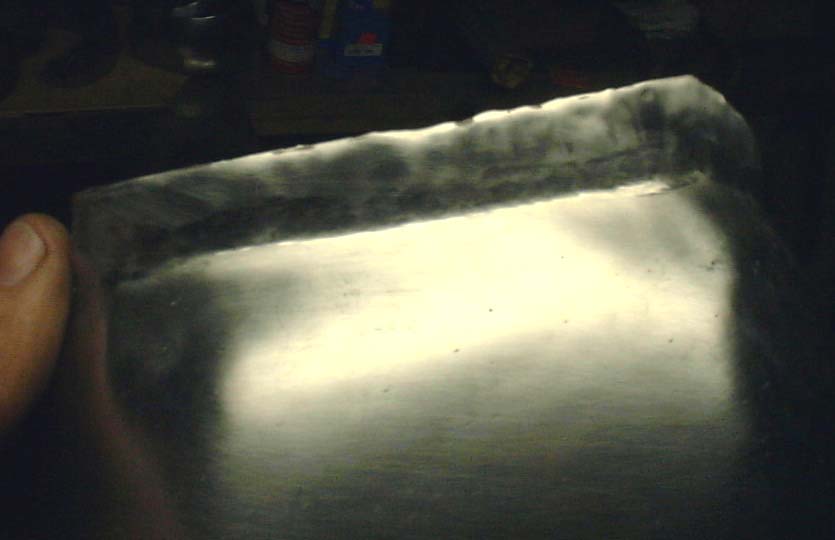
Now I clean up the lines with a fine file and put a decent satin finish on it.
It's just easier to do most of it now.
|

|
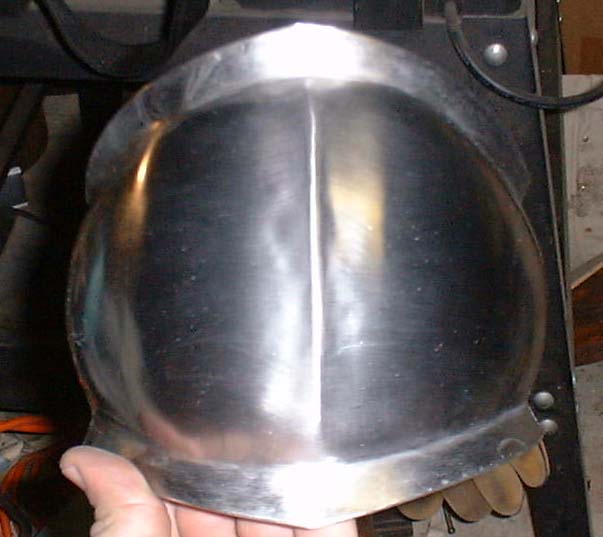
Now, put your center flute in This should be more of a crease, and not a
high, deep raised gothic flute...unles you just particularly want it that way.
After chiseling in from the rear, go back with a planishing hammer and sharpen
them up from the front. Now clean up all the stray marks and such and apply
whatever polish you want to it.
|


|
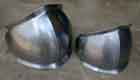
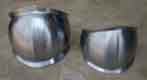
Here's the finished pair..minus strapping..
|
|
